| ||||||||||||||||||||||||||||||
|
MODERN CROSSBOWS 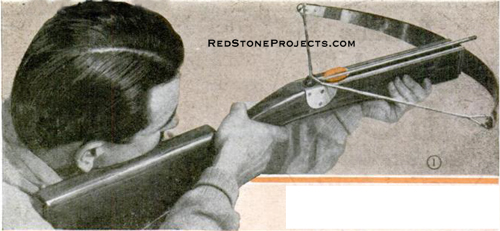
Figure 1. Shooting a Spring Steel Crossbow If you can't the bull's-eye with a regular archer's bow and arrow, try one of these modern crossbows and you'll find yourself hitting the "gold" almost every time from distances up to 60 yds. They are good for for hunting too; a 160-lb. steel bow will stop anything short of an elephant Two models are described in this story, both very similar in construction except that one has a wood bow and the other a steel bow. Comparative data is given in the table of Fig. 5. 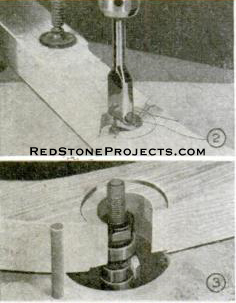
Figures 2 and 3. Drilling and Shaping The Crossbow Action Recess Stock for wood bow: The stock of the wood bow can be made from white pine. Its shape is very much like a modern rifle as can be seen in Fig. 8. Start the job by making a full-sized drawing of the stock including the full detail at the trigger as shown in Fig. 9. Transfer the stock outline to 1 7/16-in white pine and saw it out. Drill the hole for the string release, using an expansive bit as shown in Fig. 2. Recesses on either side of the hole are run in with a straight shaper cutter, Fig. 3, the guide collar rubbing the hole. Lacking shaping equipment, the recesses can be cut with a router bit in a drill press. Fig. 4 shows the mortise for the trigger being cut. 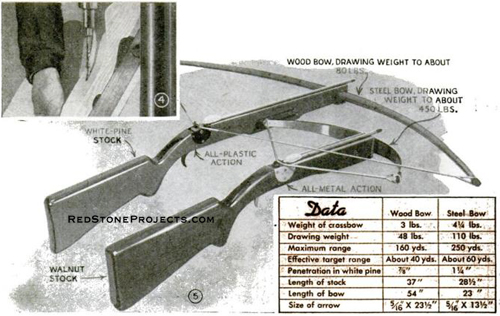
Figures 4 and 5. Cutting the Crossbow Trigger Mortise (4) and Table of Specifications for Wood and Steel Crossbows (5) Run in the arrow and hand grooves, using suitable shaper cutters. Then, shape all the edges 1/2-in. round, stopping about 1 in. from the release hole as indicated in Figs. 6 and 8. All working parts of the action are made from plastic. Dimensions given will provide sufficient strength for bows up to 60 lbs. drawing weight. Over this weight, the release plates should be plastic and the trigger should be made from 3/16-in. metal. After fitting the release plates, the top of the stock is sanded down to about the dotted line shown in Fig 9. 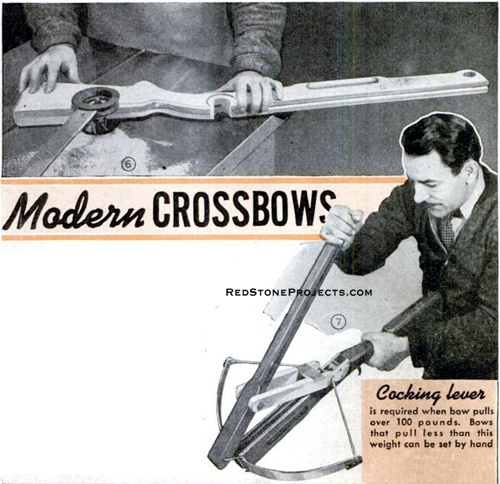
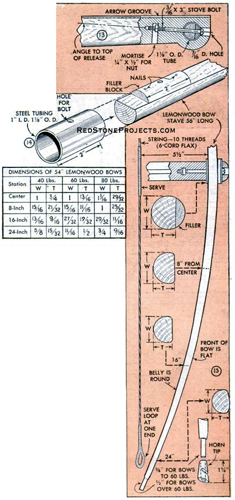
Figures 6 and 7. Shaping the Crossbow Stock (6) and Cocking the Crossbow With a Cocking Lever (7) Fig. 10 shows the operation. The sharp edges are then faired into the shaper cuts. Be careful in fitting the release plates so that screws will not interfere with this sanding and rounding operation, in other words, keep the two top screws low. The plastic trigger has a small lug on the underside near the upper end to fit inside the trigger spring, as seen in Fig. 9. Wood bow is 54 inches long, made from lemonwood.
The wood bow: The bow is made of lemon wood to the approximate sections given in the table. The 60-lb. pulling weight is recommended. The 80-lb. bow is very close to the maximum stress which can be imposed on lemon wood in this length of bow. Shaping of the bow follows standard practice, flat on the front, round on the belly. A section 2-in. long at the center is made full round by adding a filler block, as shown in Fig. 14, this section being enclosed in a steel tube. The completed bow is fitted through the hole at the front of the stock and is fastened with a 3/16-in. bolt as shown in Figs. 11, 12, 13 and 15. Note in Fig. 13, that the bow is tilted slightly so that the string when pulled back comes to about the top of the string release. If desired, the bow can be made by trimming down a regular 6-ft. bow of about 30 lbs. drawing weight. When this is shortened and the ends trimmed down a little, it will pull about 60 lbs. at 21-in. draw. Equally practical, a flat bow can be used instead of the stacked type shown, mounting the bow in a notch cut at the end of the stock. In any case, the bow must be worked carefully and broken in gradually, tugging a little on the string and then releasing until the full draw is obtained. 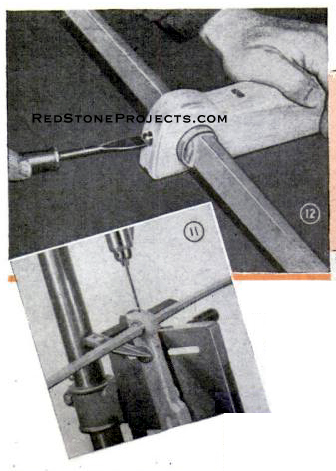
Figures 11 a 12. Match Drilling the Bow and Stock (11) and Securing the Bow With a Stove Bolt (12) The steel bow: The steel bow, Fig. 1, does not have the silky, smooth shooting action of a good wood bow, and pound for pound the wood bow will outshoot it. Against this, the steel bow offers compactness and power, and, all things considered, makes much the better crossbow. 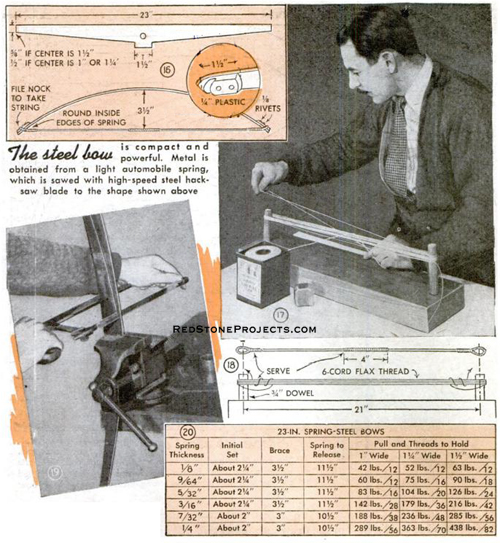
Figures 16, 17, 18, 19 and 20. Cutting the Leaf Spring Bow to Shape (19) with Details and Dimensions (16), Table Listing Crossbow Pull and Bow String Thread Count Based on Steel Bow Spring Thickness, Initial Set, Length of Brace and Distance of Bow to Release (20), Using a Winding Jig to Make the Bow String (17) and Bow String Dimensions and Winding Details (18) The spring stock can be obtained from a light automobile leaf spring. It will cost you two high-speed steel hacksaw blades to saw it to shape, Fig. 19. If the spring is a little wider than needed, it is a good idea to leave the extra metal intact at the center, as shown in Fig. 16. The bow tips are cut from sheet plastic, riveted in place and filed to take the string. The steel bow will have an initial fixed set of about 2-in. deflection, and should be braced at 3 1/2-in. deflection as shown in Fig. 16. The table, Fig 20, shows approximately what leaf spring steel will pull, in pound, at 11 1/2-in. draw. A 100 to 160-1b. bow is recommended. Extremely heavy bows over 300 lbs. drawing weight make nice exhibition pieces for flight or penetration shooting, but are no fun to shoot as you seldom retrieve the arrow intact, if at all. It is practical, however, to make two or three bows of different weights, all interchangeable on the same stock. Bow strings: Bow strings for wood bows can be purchased or made from 6-cord flax thread. This kind of thread is used in stitching machines by shoemakers. Twelve threads will hold wood bows to 80 lbs., the loop at the end being made by turning the whole string back on itself. The string for a 23-in steel bow is made on a simple wooden form, as shown in Fig. 17 and 18. In this case, the string is divided into equal parts to make the loop. Both loops and distance of 4 in. at center are wrapped, and the completed string is waxed with beeswax The string can be shortened by giving it several twists before fitting to the bow. The triangular boxed figures in table Fig. 20 are the number of threads of 6-cord flax required to hold a bow of the drawing weight indicated. Stepping on the center of the bow while the ends are supported on wood blocks will bend the bow enough to permit slipping the string in place. 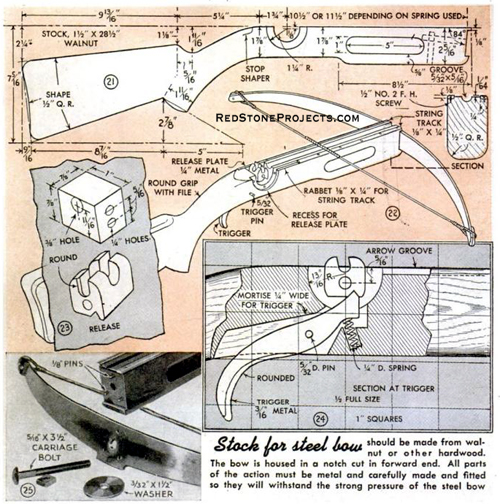
Figures 21,22,23,24 and 25. Profile and Oblique View of the Crossbow Stock with Dimensions (21 and 22), Dimensions and Details of the Rotating Bow String Release (23), Installation and Dimensions of Trigger and Release Mechanism (24), and How to Attach the Spring Steel Bow to the Crossbow Stock (25) Stock for steel bow: Because of the heavier drawing weight, the stock for a steel bow must be made from walnut or other hard, strong wood. The stock should be laid out full-size, Figs. 21 and 24, then transferred to wood, cut out, and then machined in much the same manner as the wood bow stock already described. An addition is the metal track on each side of forearm, Fig. 22. This originally was to protect the wood from the rubbing action of a metal bow string. The metal string (6-strand, 19-wire flexible cable 5/32-in. diameter) did not stand up under actual shooting and was discarded for the flax thread. The track, however, is worthwhile protection even with the flax string, although not essential. All parts of the action are metal, steel for the release, Fig. 23, and trigger, and aluminum or brass for release plates and string track. The bow is housed in notch cut in the end of the stock, and is held by means of three locating pins and a bolt, as shown in Fig. 25. The carriage bolt is ground round under the head, which is sawed to form a screwdriver slot. The release pin is 1/4-in. diameter, slotted on one end for a screwdriver and threaded on the other end to fit a tapped hole in the release plate. All metal parts are of ample strength for bows up to 400 lbs. drawing weight. Follow the release and trigger design closely; these parts are nicely balanced to provide positive holding while retaining a light trigger pull. 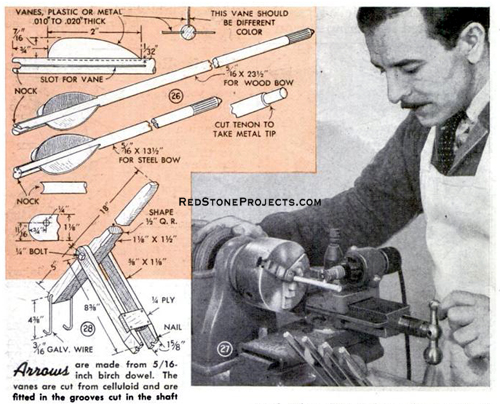
Figures 26, 27 and 28. How to Make Crossbow Bolts with Dimensions (26), a Method for Cutting Slots In the Crossbow Bolt to Attach the Fletching, or Vanes (27), How to Build a Crossbow Cocking Lever with Dimensions (28) Arrows: Arrows (know a Bolts) for both bows are 5/16-in. birch dowel. Vanes (also known as Fletching) are plastic, celluloid or metal, glued in grooves cut in the shaft. Fig. 27 shows one way of cutting the grooves, the shaft being held in the lathe, positioned by the indexing head, while a rotary hand tool mounted in a slide rest does the cutting. Vanes are mounted at right angles, Fig. 26, instead of the usual triangular pattern used for long bow arrows. This method of mounting provides perfect ruddering for smooth, straight flight and, at the same time, fits the mechanical construction of the crossbow. Cocking lever: Bows up to about 100 lbs. drawing weight, can be set by hand; over this weight it is necessary to use a cocking lever. Fig. 28 shows the construction and dimensions of a cocking lever for 11 1/2-in. draw. The galvanized wire hook which slips under the bow will automatically assume a bent position the first time it is used. Photo Fig. 7 shows the manner of using the lever. If the release is set slightly forward, the trigger will cook automatically when the string engages the rear prong of the release. Shooting: After cocking the bow, the crossbow is shot very much like a shotgun, sighting down the arrow to the target. A little practice will enable you to judge the range and drop of an arrow very nicely. When hunting, the bow can be carried cocked but without arrow. When not in use, the steel bow is left braced, but the wood bow is unstrung. Needless to say, any bow over 100 lbs. packs a terrific drive, and the utmost caution should be exercised in its use. Never fit an arrow in place until you are ready to shoot, and don't point the crossbow in any other direction than toward the target when the arrow is in place. |
||||||||||||||||||||||||||||||


Get a restored, printable copy of these Modern Crossbow Plans with Enhanced and Enlarged Figures and Illustrations and Searchable Text. |
10 Pages, Print Size 8.5" x 11" |
|
|
|
|
|
|
Plan # TP6-TSM |
Highland Trebuchet Price $12.95 FREE Shipping |
|
|
|

Plan # BP1-TSM |
Roman Ballista Price $12.95 FREE Shipping |
|
|
|
Plan # TP5-TSM |
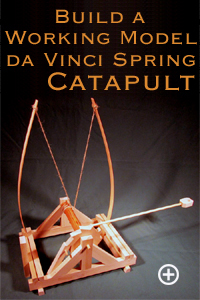
daVinci Trebuchet Price $12.95 FREE Shipping |
|
|
|
Plan # RC1-TSM |
Repeating Crossbow Price $12.95 FREE Shipping |
|
|
|
Plan # CP1-TSM |
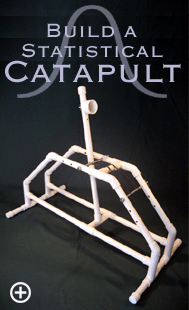
Statistical Catapult Price $12.95 FREE Shipping |
|
|
|

Plan # TP3-TSM |
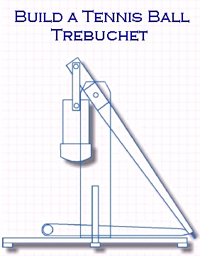
Golf Ball Trebuchet Price $12.95 FREE Shipping |
|
|
|
Plan # CP2-TSM |
Spring Catapult Price $12.95 FREE Shipping |
|
|
|
Plan # TP2-TSM |
Ball Trebuchet Price $12.95 FREE Shipping |
|
|
|

Plan # MP1-TSM |
Mangonel Catapult Price $12.95 FREE Shipping |
|
|
|

Plan # OP1-TSM |
Roman Catapult Price $12.95 FREE Shipping |
|
|
|
Plan # TP1-TSM |
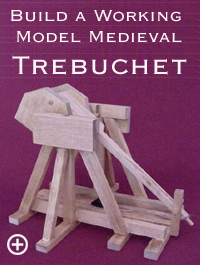
Medieval Trebuchet Price $12.95 FREE Shipping |
|
|
|

Plan # WS1-TSM |
Water Screw Price $12.95 FREE Shipping |
|
|
|
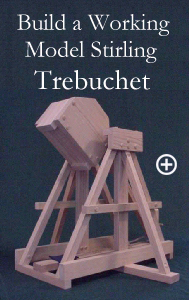
Plan # TP4-TSM |
Stirling Trebuchet Price $12.95 FREE Shipping |
|
|
|
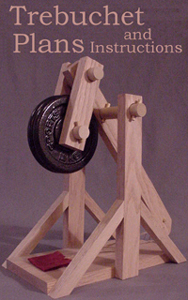
Plan # TP7-TSM |
Trebuchet Price $12.95 FREE Shipping |
|
 |
 |
 |
|||||||
 |
|||||||||