Free Shipping
Truck Camper Plans
Build a Simple and Rugged Pick-Up Based Weekend Retreat
|
Truck Camper Plans
Build a Simple and Rugged Pick-Up Based Weekend Retreat
 |
PDF Format |
|
|
All Orders Processed
On a Secure Server
|
Price $12.95
|
|
Get a restored copy of these vintage Pick-A-Back
Truck Camper Plans with 13 Pages of Enhanced and Enlarged Figures
and Illustrations and Searchable Text.
|
We will email these plans, to the address provided
with your payment, within 48 hours following receipt of your order.
|
|
|More
Vintage Trailer Plans|
|
|

|
|
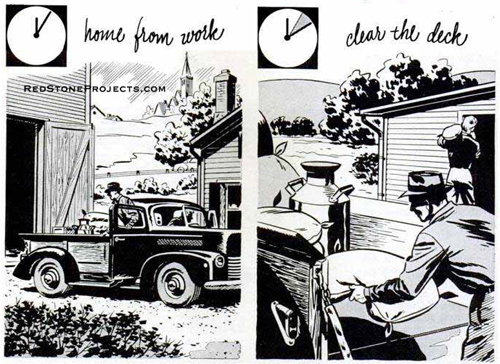
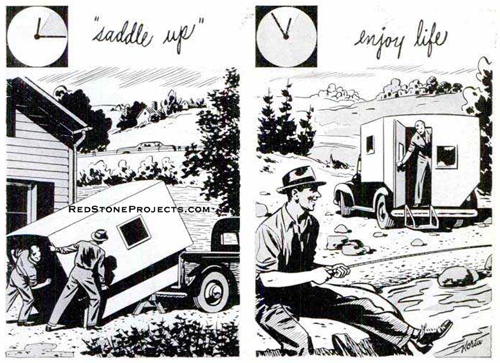
| DESIGNED expressly for the owner of a small pick-up truck
who likes to get in all the fishing or hunting possible over a weekend,
this pickaback house trailer is "ready to go" on a moment's notice. As
soon as you're through for the day, slip the trailer into the truck bed,
and you're all set to head for that favorite lake or trout stream. The
trailer includes all the accessories necessary for real comfort, such as
storage lockers for food and clothing, gas stove and supply tank, toilet
and bed.
Dimensions of the center section allow 66 in. of headroom.
Of course, by simply lengthening the frame uprights it is possible to increase
the headroom to 72 in. or more, but the proportions of length and width
to height would lack the symmetry of the original design. Also, any increase
in the over-all height would make the unit less adaptable to travel on
narrow roads or trails in the back country. |
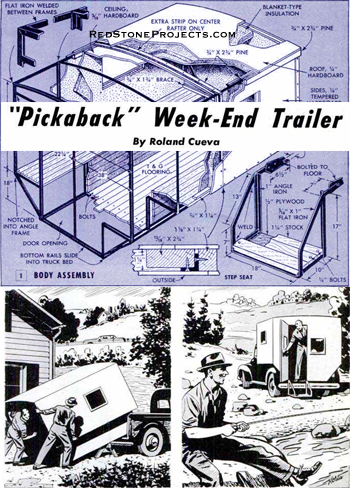
| You get a good idea of the construction from the cutaway
view in Fig. 1. Note that the walls and ceiling are of approved trailer-type
construction with a blanket-type insulation between inner and outer wall
coverings. Note also how the floor is offset at the sides to form a ledge,
or seat, at each side of the center section. Because of variations in the
size of the bed on various makes of pick-up trucks, some of the dimensions
given in the details may have to be altered to fit the truck bed. Be sure
to take careful measurements of the width, length and the height of the
sides of your truck bed before cutting any materials. When finished, the
body frame should slide easily in and out of the truck bed without binding
at any point.
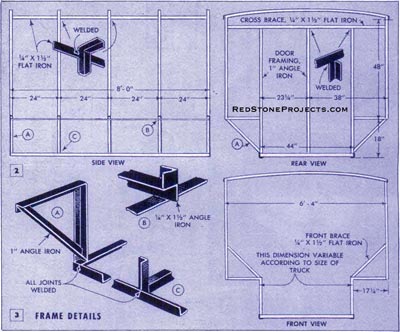
The frame is made of welded angle iron and consists of
five vertical members joined across the top by carlins, or rafters, curved
to a 3-in. crown. Spaced on 24-in. centers, the five frames give an over-all
length of just over 8 ft. As you will see from study of the details and
the accompanying photos, the frames are joined longitudinally at the bottom
corners by 1 1/2-in. angle-iron rails, detail C in Fig. 2, which serve
as stiffeners and also as sills, or runners, for sliding the unit on and
off the truck bed. At the upper corners, 1/4 x 1 1/2-in flat-iron strips
are butt-welded to the frames, upper left-hand detail in Fig.1. Note that
each frame is welded as a separate unit before welding on the bottom rails
and the flat-iron strips, or plates. In welding the frames, the bottom
U-shaped member is made by bending A-frames from angle iron, V-notching
one leg at the point where the bend will come. Then, after bending, the
meeting edges are welded. |
|
Figure
1. Body Assembly
|
Get a restored copy of these vintage Pick-A-Back Truck
Camper Plans with 13 Pages of Enhanced and Enlarged Figures and
Illustrations and Searchable Text.
All Orders Processed
On a Secure Server
|
|
| The A-frames are welded to the bottom cross rails and
the uprights are butt-welded to the outer ends. Then the curved carlin,
or rafter, is welded in place to finish the individual frame. Care must
be taken in welding to get frames of a uniform size. Use of a welding jig
will assure uniformity. If the builder is not an experienced welder, it
will pay to have all welding done by a professional. |
|
|
Figures 2 and 3. Frame Details.
|
| Now, note that a flat-iron strip is welded to the A-frames
under the over-hang on both sides, detail B in Fig. 2. These strips run
the full length of the body frame and serve the dual purpose of making
the frame more rigid and at the same time providing a convenient rack for
lashing a tent, tarpaulin or other extra equipment for some special purpose. |
|
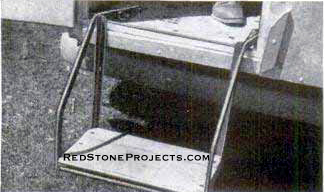
|
Novel step-seat folds inside to form a comfortable
seat, making use of all available space.
|
|
| Two extra uprights and one full-width horizontal member
make the door frame as shown in Figs. 1 and 2. The uprights are 1-in. angle
iron and the cross member is of flat iron, as indicated in the rear view,
Fig. 2. Also, two diagonal angle-iron braces are welded across the A-members
of the back frame, detail A in Figs. 1 and 2. |
|
|
Underneath view of body offset and the angle iron
framing which fits inside the bed of the truck.
|
| Note especially that the same braces at the front of
the frame are placed above the overhang as in the front view, Fig. 3, and
that flat iron is used instead of angle. It is necessary that the front
braces be placed in this position to prevent interference when loading
the body onto the truck bed. |
|
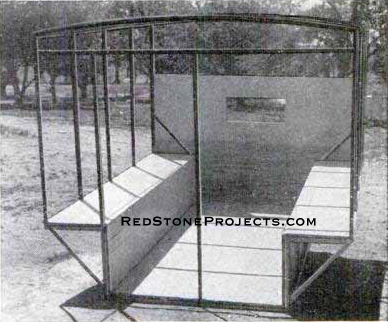
|
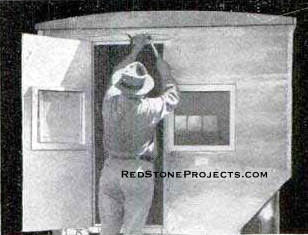
The angle-iron frame of the "Pick-A-Back" trailer
body with the floor and front pane installed. Note the front window opening.
|
| After all metal parts of the frame have been welded together
to form a unit, the next step is to install the tongue-and-groove flooring.
Lay the center section first, and then carry the flooring up the vertical
sides and across the overhang on each side as in Fig. 1. Because of the
metal "joists" the flooring must be attached with 1 1/4-in. 8-32 machine
screws with nuts and lock washers. The clearance holes for the screws are
drilled through each flooring board and through the angle iron. Use one
screw at each frame, drilling through the center of the board. Be sure
that the boards are drawn tightly together as they are laid. It's a good
idea to shellac the boards before laying to prevent absorption of moisture. |
|
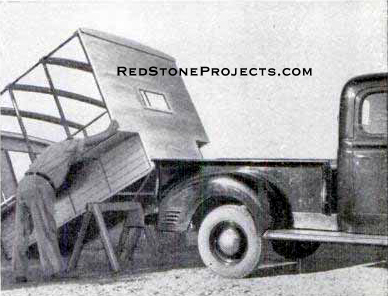
|
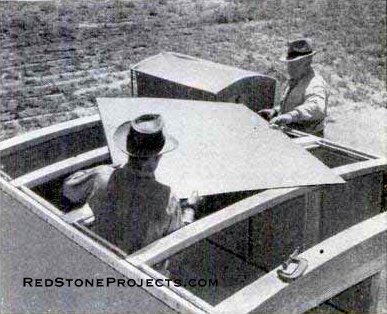
Loading the unit is easy by supporting the front
end on sawhorses.
|
| Next, install the front and back panels, Fig. 4. These
are cut from 1/2-in. waterproof plywood and are attached to the angle-iron
framing with machine screws of the same size as used for the flooring.
After installing the front and back panels, measure and cut an opening
for the front window. This is centered in the body frame and is at the
same height as the rear window in the truck cab. Note also the position
of the rear windows, one in the door and the other in the body panel, rear
view in Fig. 4. These three are unit sash and are not adjustable. Placing
the sash in this position enables the driver to see the road through the
rear-view mirror in the truck cab. However, as an added precaution it's
a good idea to install a truck-type extension mirror on the cab. |
|
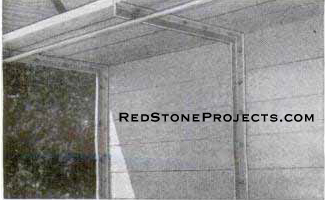
|
Roof carlins, or rafters, are formed to form a watershed.
Rafters are faced with wood strips.
|
| At this stage, the body frame can be loaded onto the
truck for completion of the job. The first thing is to attach wooden strips
to the angle-iron frame members at the sides and across the roof carlins
so that the outer and inner wall panels can be screwed in place. |

|
|
Figure 4. Body Sheathing and Interior.
|
| Note the lower center detail in Fig. 1, which shows how
a wide wooden strip is attached to the center frame to back up the joint
in the inner wall covering. All the other strips are attached to the front
side of the frame members. Either wood screws or machine screws with nuts
can be used to attach the wooden strips to the angle-iron uprights. The
wooden roof strips are centered over the curved carlins. |

|
|
Figure 5. Window Detail
|
| Next, attach the side panels which are cut from 1/4-in.
tempered hardboard. The joint on both sides is made over the center upright
as in the side view, Fig. 4. It should be set in waterproof glue and fastened
with two rows of screws which are equally spaced 4 to 6 in. apart. Now,
attach the trim strips, or nailing strips, across the front and back and
the sides as in the side, rear and front views in Fig. 4. Note that the
front and back strips are band sawed to the curve of the roof carlins.
The top edges of the side pieces are beveled to meet the curve of the carlins
to get a smooth, tight joint between the sides and the roof covering.
The top panels also are of 1/4-in. tempered hardboard
and are joined on the center carlin. Use waterproof glue in all the joints
and fasten with flatheaded wood screws equally spaced in straight rows.
Allow the top panels to project 1/16 to 1/8 in. all around to allow for
inequalities in fitting. The projections are planed flush after the roof
is finished. Finally, the four aluminum angles are attached. These protect
the corners of the body and help to prevent leaks. |
 |
|
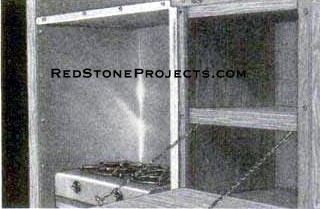
Kitchen stove, pantry and drop-down counter.
|
| Next, cut openings for the side windows, Figs. 4 and
5, and you're ready to finish the interior. Nail in 3/4 x 1 1/4-in. strips
to form sills as in Fig. 1, then apply insulating material to the walls
and ceilings. Cover walls and ceilings with 3/16-in. softboard, or birch
plywood of approximately the same thickness. Use cup washers and oval-headed
screws for attaching the interior finish. Fig. 5 details the window framing.
Only the side-window sashes are hinged; the others are stationary.
On the side windows, screen wire is attached to the inner
side of the outer frame, or casing, before it is screwed in place. The
hinged sashes are held open by a light chain attached to the ceiling with
a screw eye. Trailer-type window units also can be used instead of the
type detailed in Fig. 5. These are furnished as a unit complete with screen
and metal frame ready to install in the window opening. Lintels over the
windows and door are cut from 3/4-in. stock and the top edges are beveled
to form a watershed. The parts are attached to the framing with screws. |
|
|
Top edges of the door and window lintels are beveled
to form drip caps.
|
| The back door is a simple unit made from waterproof plywood.
This is hinged to swing outward and is provided with a night latch. The
novel step-seat, Fig. 1 and the photo below Fig. 3, provides not only a
handy rear step but an extra seat when folded inside. The frame of the
step is built up by bending and welding angles and flat iron together to
form the supporting frame as in the lower right-hand detail, Fig. 1.
The short angles to which the step is pivoted are shaped
as shown by sawing and filing and are bolted to the floor of the center
section. They must be located so that when the step is folded outward the
vertical members of the frame will bear against the outer edge of the doorsill
as in the photo below Fig. 3. Cover the bottom of the step, this forms
the seat when the step is folded, with 1/2-in. waterproof plywood. |
|
|
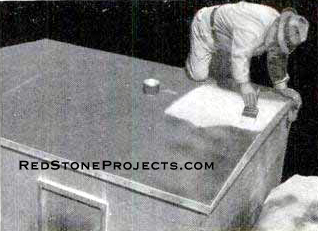
Prime coat the roof, sides, and ends with one coat
of aluminum paint.
|
| No construction details of the interior fittings have
been included, as the arrangement of the cabinets and accessories has been
left to the discretion of the builder. However, the lower left-hand detail
in Fig. 4 suggests a typical arrangement of the interior. If desired, the
center-section floor can be covered with linoleum or rubber tile and the
exposed portions of the overhang on both sides can be upholstered to form
two comfortable seats.
Paint the outside of the body with one coat of aluminum
paint as a primer, then finish with two coats of outdoor enamel in whatever
color you desire. If the inside has been finished with birch plywood, give
it two coats of varnish in the natural color.
The unit should be fastened in place on the truck bed
by two 3/8-in. bolts passing through the floor underneath the bed and through
the metal bed of the truck. Locate the bolts so that they are easily reached
from the underside of the bed and use lock washers to prevent the bolts
from loosening.*** |
Any 2 Vintage Trailer Plans
$19.95 FREE Shipping |
|
Select 2 Vintage Travel Trailer Plans
|
|
|